Deploy ClamAV on Upsun, on service mode.

In a previous article, we integrated ClamAV in one-time scan mode. This mode takes time since it scans the integrity of a file tree.
In this new article, we will integrate ClamAV in Service mode in order to scan files on demand. But let’s start with a reminder about ClamAV
What is ClamAV?
ClamAV (Clam AntiVirus) is an open-source antivirus engine designed for detecting malware, viruses, and other malicious threats. It is widely used for scanning file servers, and web applications. ClamAV is known for its lightweight nature and ability to be integrated into various security systems.

In this tutorial we will be implementing ClamAV in service mode.
Context
In this tutorial, we will simulate a typical application requirement.
Our example application, built in PHP (though this approach can be applied to different languages and frameworks), allows users to upload files.
Before integrating the uploaded files into the filesystem, we want them to be scanned by ClamAV for security purposes.
Workflow:
graph LR;
    Upsun-->PHP_upload;
    PHP_upload-->ClamAV_scan;
    ClamAV_scan-->FS;
This tutorial builds on the setup from the previous article.
At this stage, we already have:
- ClamAV binaries installed via Composable Image
- Writable mount points for uploaded files (
data) - Necessary mounts for ClamAV to function properly (
var)
To integrate ClamAV efficiently, we will run it in daemon mode within the clamav container.
For this tutorial, we will introduce a new PHP application to upload files and use the existing clamav application to check uploaded files.
So we will need to:
- transform our project in a multiple application structure
- run ClamAV in Daemon mode
- add a new
appPHP application to upload files
Prepare your ClamAV project
The initial step will be to prepare our source code architecture to welcome a frontend application that will display a PHP upload form.
Create a preview environment
As we never work on the production environment, we will create a dedicated preview environment.
To create a preview environment, use the following command line.
It will create, on the fly, an exact copy of your parent environment (here, branch main, so it’s your production environment).
upsun environment:branch php-upload-formThis will create and switch to a new local Git branch php-upload-form and deploy the corresponding preview environment in less than a few minutes.
Transform project with a multiple application structure
To prepare the project for handling multiple applications, move all existing ClamAV source code into a dedicated clamav folder.
From the root of your project source code, execute the following command lines:
mkdir -p clamav
for file in * .[^.]*; do
  if [[ "$file" != "clamav" && "$file" != ".upsun" && "$file" != ".git" ]]; then
    mv -- "$file" clamav/
  fi
done
Then, in your .upsun/config.yaml file, update the source.root parameter of your app application:
| |
Setting up ClamAV
Enable ClamAV On-Access scanning mode
In order to run ClamAV as a service (On-Access scanning mode), we first need to enable the TCP listening mode in its configuration.
To do so, update your clamav/etc/clamd.conf file with these 2 lines at the end:
| |
Then, update the clamav/scripts/clam_install.sh file with the following:
| |
This will get the current container IP and set it to the corresponding TCPAddr ClamAV variable.
Add ClamAV to SystemD
To start ClamAV as a service, we can execute clamd binary within our clamav container:
clamd --config-file="/app/var/etc/clamd.conf"However, in case of an error, there is no guarantee that the service will remain available. To ensure continuous operation, we need to implement a watchdog mechanism. Upsun provides SystemD in userspace mode for this purpose.
Let’s start by defining a service unit file clamav/scripts/systemd.d/clamav.service:
[Unit]
Description=Clamav Service
After=network.target
StartLimitIntervalSec=0

[Service]
Type=simple
Restart=always
RestartSec=1
TimeoutSec=30s
ExecStart=/app/.local/bin/clamd --config-file="/app/var/etc/clamd.conf" --foreground=true
ExecReload=/bin/kill -USR2 $MAINPID
ExecStartPre=/bin/mkdir -p /var/run/clamav
To make this unit loadable by SystemD from userspace, we need to structure the unit files directory properly.
#!/usr/bin/env bash
# -*- coding: utf-8 -*-

echo "Create Systemd user folder structure..."
mkdir -p ~/.config/systemd/user

echo "Copy Systemd user unit services..."
cp -R scripts/systemd.d/* ~/.config/systemd/user/
Then, add the unit to SystemD.
#!/usr/bin/env bash
# -*- coding: utf-8 -*-

echo "Reload Services"
systemctl --user daemon-reload

echo "Activating with user"
systemctl --user enable clamav.service

echo "Starting with user"
systemctl --user start clamav.service

echo "Show current services"
systemctl --user status clamav.service
And let’s add execution permissions to the script.
chmod +x clamav/scripts/*And,integrate all these elements into Upsun to ensure they are applied with each deployment,
by calling ./scripts/systemd_install.sh in your hooks.build, and ./scripts/systemd_init.sh in your hooks.deploy:
| |
Deploying ClamAV on Upsun
We need to push these additions to the Upsun project.
git add .
git commit -m "Add ClamAV service to SystemD"
upsun push
After deployment, you can check that ClamAV is listening to port 3310 by connecting to the clamav container and execute netstat -laputne command line:
| |
Troubleshoot: If you don’t, please be sure that the ClamAV database has been initialized, at least once. If not, execute the following command line:
upsun ssh --app=clamav -- ./scripts/clam_update-db.shAdd app PHP application
This basic PHP application will display a basic form to upload a file and then use an external library (appwrite/php-clamav) to perform the ClamAV scan.
Create an app folder
Our app source code will be located in a app folder. To create this folder, execute the following:
mkdir -p appCreate the upload form
All the logic of this PHP form will be located in a public/index.php file, with the following:
<h2>Upload and scan a file</h2>
<?php
require_once $_ENV['PLATFORM_APP_DIR'] . '/vendor/autoload.php';
use Appwrite\ClamAV\Network;
if (isset($_POST['upload_form'])) {
$clam = new Network($_ENV['CLAMAV_HOST'], '3310');
if ($clam->ping()) { // Check ClamAV is up and running
$scanDestination = $_ENV['PLATFORM_APP_DIR'] . "/data/folder2scan/" . $_FILES['upfile']['name'];
$uploadDestination = $_ENV['PLATFORM_APP_DIR'] . "/data/uploads/" . $_FILES['upfile']['name'];
$quarantineDestination = $_ENV['PLATFORM_APP_DIR'] . "/data/quarantine/" . $_FILES['upfile']['name'];
// Move candidate file to a shared folder with clamav app
move_uploaded_file($_FILES['upfile']['tmp_name'], $scanDestination);
if ($clam->fileScan($scanDestination)) {
rename($scanDestination, $uploadDestination);
echo "</br>No virus detected in " . $_FILES['upfile']['name'];
} else {
rename($scanDestination, $quarantineDestination); // move infected file to the data/quarantine folder
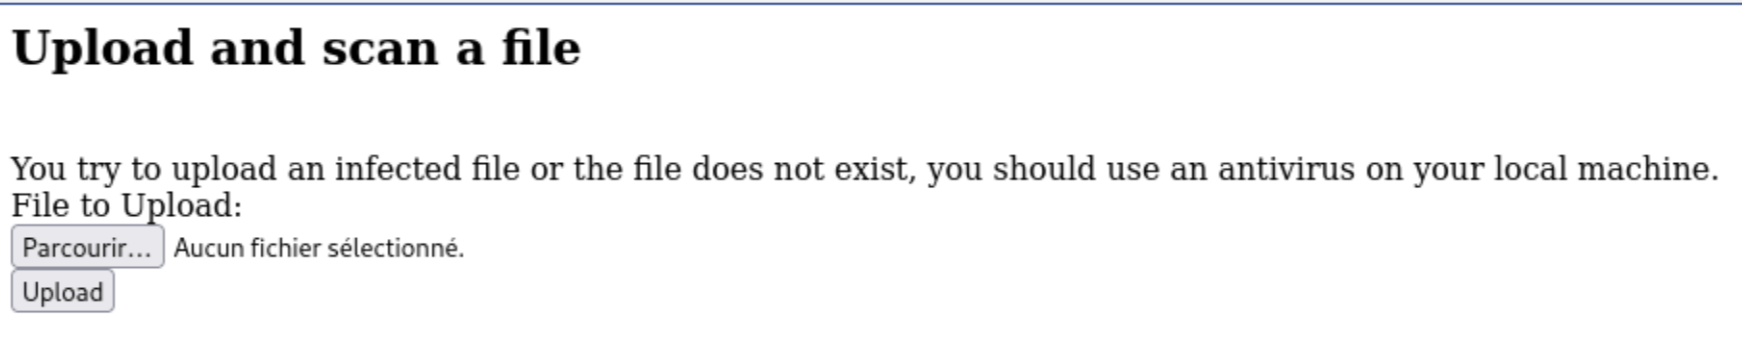
echo "</br>You try to upload an infected file or the file does not exist, you should use an antivirus on your local machine.";
}
} else {
echo "</br>ClamAV is not running, starting ClamAV daemon can take some time, please retry later";
}
}
?>
<form method="POST" action="<?php echo $_SERVER['PHP_SELF']; ?>" enctype="multipart/form-data">
<label for="file">File to Upload:</label></br>
<input type="file" name="upfile" required></br>
<input type="submit" value="Upload" name="upload_form"/>
</form>
Please note that before scanning this candidate file, we first move the file into the shared /data/folder2scan/ folder for clamav app being able to scan the file.
If ClamAV does not detect any threat, then the file is moved to a final /data/uploads/ folder, moved otherwise in the /data/quarantine/ folder.
Import appwrite/php-clamav library
We will need to import appwrite/php-clamav library using Composer.
From the app folder, execute the following command line:
cd app
composer require appwrite/php-clamav
cd ..
Configure app application
Then, we need to declare a new app Upsun application.
Update your .upsun/config.yaml file with the following:
| |
Some information on this app configuration:
- line 16-17: please note the
service: clamavparameter. This additional parameter allowsappandclamavapps sharing the same NFS folders (see Share a mount between several apps documentation page). This will be useful for ourappapplication to upload files to scan in a directory shared with theclamavapplication (ClamAV scan only local files). - line 25-28: we add a relationship from
apptoclamav. This will enable internal communication between apps and expose environment variables within theappcontainer withclamavapp info (seeCLAMAV_*envVars in yourappcontainer).
Deploy
Finally, we need to push all of this on our Upsun project.
git add .
git commit -m "Add app application"
upsun push
Test it
You can then open the frontend by using the following command line:
upsun environment:url --primaryYou should end up on this frontend page:
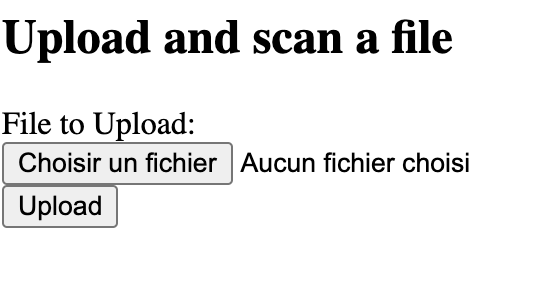
You can start playing with safe and infected files.
As mention in the previous episode,
you can simulate an infected file by creating a local fake.txt file with such a source code:
X5O!P%@AP[4\PZX54(P^)7CC)7}$EICAR-STANDARD-ANTIVIRUS-TEST-FILE!$H+H*This is a typical Eicar-Signature virus,
and is totally safe for your local machine and for your Upsun application.
Please note: some local antivirus software, as SentinelOne, will detect this file as a virus and will immediately move them, after saving it, to your local quarantine folder, and so, this infected file will disappear from your machine. We had a hard time finding a way to test it.
Tips: we used a non-protected laptop (😇) to upload it.
After uploading this fake.txt file, you should get such a response:
Conclusion
Both methods (one-time scan and service mode) can coexist within the same project.
For example, we can scan files at the time of upload to ensure immediate security checks while also running a full scan of the entire file repository every night.
Project on our Github Upsun (branch php-upload-form)